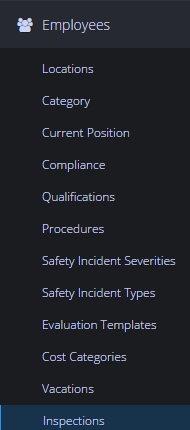
CSP Plus Admin Employees Support Section |
Admin Employee Inpsection
You have the ability to make as many unique Inspection Forms for your Company, based on your needs. We don't restrict you to a set Inspection List.
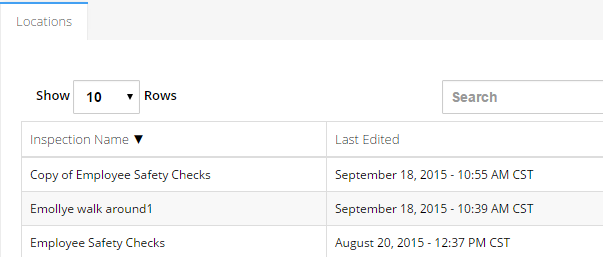
Inspection Dashboard
The table will show your list of all your Inspections
To Create a New Inpsection Form
This Section is for you to create a new Inspections for your company.
- Click Add New Inspection Button

1. Edit Inspection Tab

- Name - Enter in your Inspection Name
- Examples: Employee Safety Checks, Climbing Harness Safety Checks
Save Inspection
Click Save Categroy Button
To Add Groups/Questions to the Inspection
The Inspection Group section allows you to created multiple Groups for your Inspection Form. You could have different sections on your form and you can organize them in different Groups. You can create as Many as you wish.

Add Insection Groups
- Click on the Inspection Form you just created
- Click on

- Name - Fill out a new Name (Examples: Safety Equipment)
- Click Save
Add Questions

- Click on the Group EDIT button you just made
- You will be brought to the Edit Group with Group Questions on the Right
- Click Add Questions

- Name - Enter in a Question Name
- E.G - Hard Hat, Safety Boots:
- Description - This is where you enter in Text so the Employee can see what the they need to do.
- E.G - Is the Hard Hat on?
- E.G - Is the Hard Hat on?
Add Options
This is where the User will see the answer they will click for each question.
You can enter in whatever you wish, but it would be best to do something like G - Good, P - Poor, N/A - Not Applicable.
As the more Options you have the less room you will have on your display.
- Click on Add Option - It will then show you the Following:


- Answer - This is where you would put in the G, P, N/A - Yes, No
(This will be displayed in your Inspection Application - Remember that the size of the screen on a Smartphone is smaller than a Monitor) - Color - Choose a Color for the Answer
- Has Notes - If you select Has Notes it will provide the user a place to add notes
- Notes Required - Notes are Required if selected - If the Item in question is POOR - Click on this to get info on the problem (You must Select Has Notes to get this to check)
- Notify Manager - If this is selected the Manager Associated to this Asset will be notified right after the Submit Button has been Clicked for the Inspection
- Remove - Deletes the Option
Note: You have the ability to move them in any order - To do this simply click on the the Group you would like to be moved and drag it above or below the other Group you wish it to be moved to - Click Save
Time Saving Note: Once you have made up your Options Choose - G,P,N/A - Color are correct, What ones should have a note and notify Manager - Instead of doing this for Each question each time - once you have Saved your Question - Click on the Save & Copy  button. This will make you a Copy of your Question with all your Options Already Populated.
2. Assigned Resources Tab
This shows you what Assets are using this Inspection - If you wish to assing this Inspection to an Asset go to the Asset Inpsection page and go to Assignemtns Tab - click here
3. Employes to Recieve the Report
This will give the ability for an additional Employee to see a Inspection report rather than just the Manager. Inspection reports with issues will as before notify the Manager, in addition to any Employee's now added. The additional Employee will have Read Only access to the report.
To add an employee,
- Go to the Inspection Report you wish to add the employee to
- Click the Tab – “Employees to Receive the Report".
- Add a name to the “Employees Added” by selection the name,
- Clicking the ADD button
- Click SAVE
An employee can view the Report
- Logging into to CSP Plus, go to the Section for the Report (i.e. Vehicles)
- Locate the tab “Inspection Managers Notifications”.
- All Reports that needed Managers Approval will be visible.
- Managers of an ASSET will have approve / edit capability, other will have READ only access
4. External Contacts to Receive the Report
This will allow any External Contact to get a PDF format of reports with issues. This will send out the PDF to the email on file only if there has been an issue with an Inspection Reprort that has"Notify Manager" Check off.
You would use this feature if you wish to send out a PDF to an External Person that is not using CSP Plus.
- Enter a Valid Email Address
- Click the Add Email Button

- Click Save to retain the email address
- Note - You can enter in as many Email as you wish here.
Save Menu

- Save - This will Save your New Inspection
- Save & Close - This will Save and Close and bring you back to the main Inspection Screen
- Save & New - This will Save & Make a New Inspection Name to be filled out
- Save & Copy - This will Save & mae a copy of your Inspection
- Close - This will Close this window and bring you back one section - Please Note: That it will NOT Save the new Inspection you just created